
Textures Window
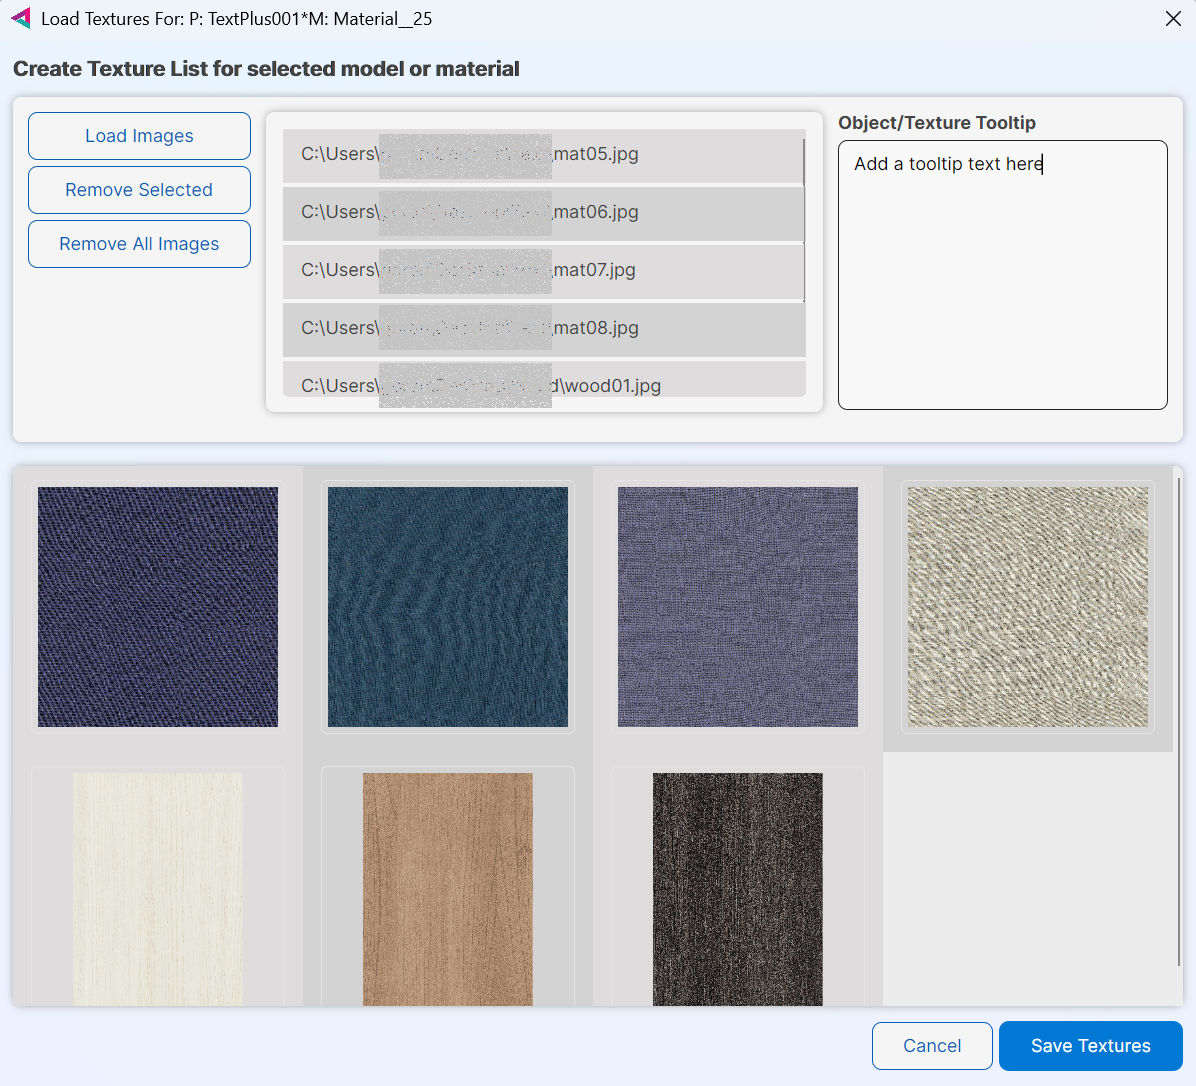
The Textures Window allows you to manage images used as diffuse maps for your object materials. After selecting an object or material, you can assign images to it, remove them, and set tooltips for that material.
Tooltips are displayed in the HTML frontend when users hover their mouse over a specific object in the scene.
Saved Textures Panel
Once you save a texture group, it appears in the Saved Textures Panel in the 3D Model and Materials tab page. From there, you can:
- Rename the group name (for display in the HTML frontend).
- Edit group images if you need to correct or update them.
WooCommerce Export
If you export your project as a WooCommerce product, the dedicated export page allows you to rename image files. These names will be displayed as product attribute terms.
Buttons and Actions
The buttons in this window are straightforward:
- Load Images – Search and load images from your system.
- Remove Selected – Remove the currently selected images.
- Selection – Works as a toggle button for choosing images.
- Remove All Images – Remove all images from the panel.
- Save Textures – Save your texture group once editing is complete.
Note: If you want to remove an entire texture group, you must do this from the 3D Model and Materials tab page.
Object Replacements Window
In addition to assigning textures, EasyThree allows you to assign and add prepared objects that can be swapped in real time on the HTML frontend.
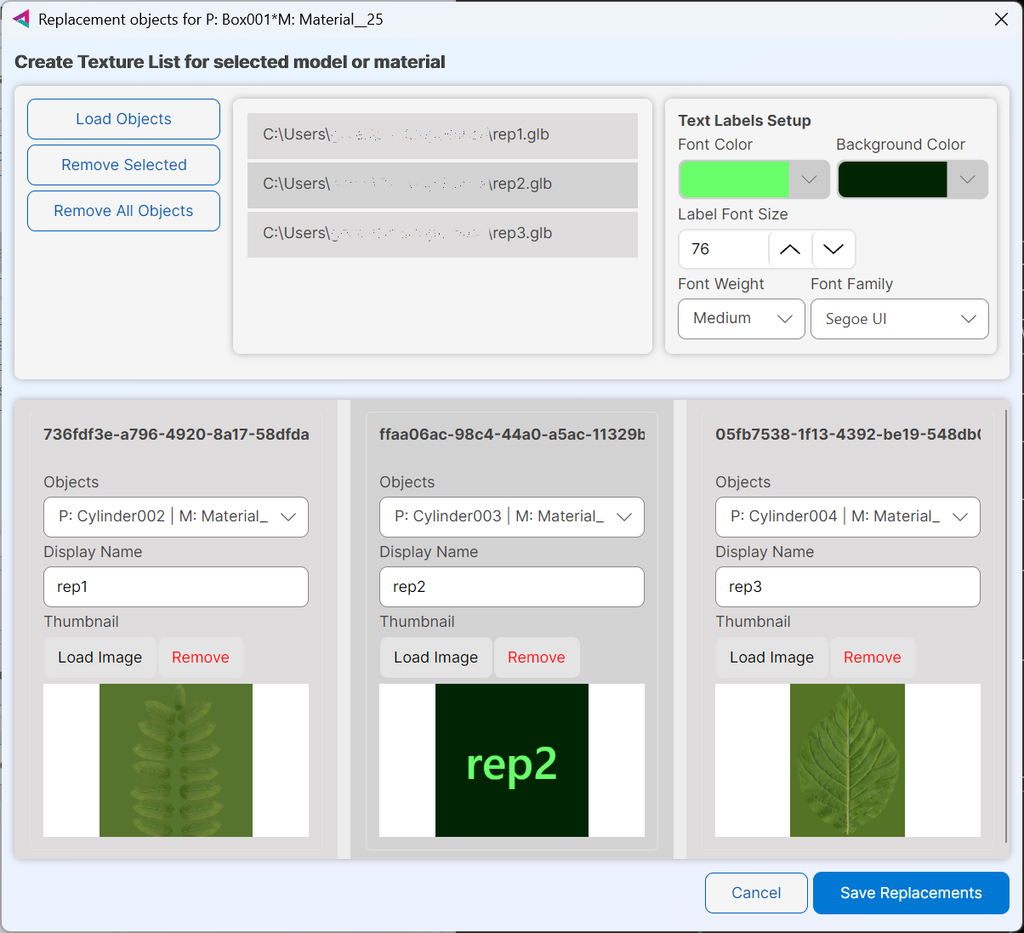
This is done through the Object Replacement Window. While the interface is similar to the Textures Window, there are important differences.
Preparing Replacement Objects
- Load prepared objects into the window.
- For best results, export a single collapsed object with one material from your preferred 3D editor.
- Ensure the replacement object has the same dimensions and orientation as the original (parent) object.
Replacement Settings
For each replacement object, you can define:
- Replacement object – the prepared object that will be swapped in.
- Display name – the name shown in the HTML frontend.
- Image – the image used in the frontend interface.
Image Behavior
You can customize the auto-generated image by adjusting colors and font options.
If you load an image for the swap, it will be displayed as the button background in the HTML frontend.
If no image is provided, EasyThree will automatically generate one using the Display Name.
Buttons and Actions
The buttons in this window are straightforward:
- Load Objects – Search and load objects from your system.
- Remove Selected – Remove the currently selected objects.
- Selection – Works as a toggle button for choosing objects.
- Remove All Objects – Remove all objects from the panel.
- Save Replacements – Save your replacement group once editing is complete.
Note: If you want to remove an entire group, you must do this from the 3D Model and Materials tab page.
Saved Textures Panel
Once you save a replacement group, it appears in the Saved Object Replacements Panel in the 3D Model and Materials tab page. From there, you can:
Edit group if you need to correct or update.
Rename the group name (for display in the HTML frontend).