
While on Camera page you set default view for your scene, when HTML page is loaded, on Camera views page you can create custom and personalized views of your 3D object and scene itself, to easy navigate and display all important parts of your beautiful 3D work.
🔔 Workflow
You interact with your scene in preview browser with move, rotate and pan controls and when you satisfied with your camera position, you save your view with “Fill Project Data” button.
Of course, your camera target position are also saved.
Your view is saved with unique identifier and displayed on the list “Created Camera Configurations”.
⚠️ IMPORTANT
After updating your project, all saved camera views are placed in two places:
1. In the main menu on project frontend. You can enable or disable functionality on main “Project Setup” page using “Include Camera Views” checkbox.
2. In your scene space as clickable 3D objects. You set and enable or disable this functionality here, on this page using “Add point sprites to 3D scene” checkbox.
Created Camera Configurations
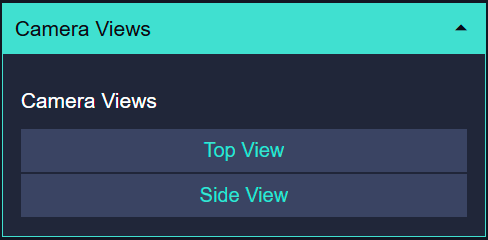
The list shows your predefined camera positions, with unique identifier.
Every point can be renamed with your own name. You need to enter desired name in saved camera view textbox in the list.
Tooltips
Each camera view group includes a TT button for entering group-specific tooltip text.
Use this to provide explanations, instructions, or contextual guidance for your users.
Tooltip display is fully automated:
- If a texture group has saved tooltip text, it will be shown automatically.
- Empty tooltips are ignored and will not be displayed.
Also if you want to remove saved view, you can do with remove (“X”) button.
You can add as many as you want camera views for your scene, but keep in mind on overall performance of your html application.
When you rename saved Camera View, this name will be used in the main menu frontend instead of unique identifier.
Setting below are for all saved camera view configurations.
- Fill Project Data
After you set your view in preview browser, you can collect and save this view camera data. Your saved view will be visible on the Created Camera Configurations list. - Add point sprites to 3D scene
Enable or disable this to add visual markers (sprites) at saved camera view positions for reference in your scene.
Sprite is a plane that always faces towards the camera. - Sprite Size
Adjust the size of your sprites, in accordance to your scene setup. - Select Easing Type
You can choose between different easing types for use with camera transitions on front end html.
These are most used and proven transitions on the internet, and in combination with animation duration you can create beautiful camera movements from point to point.
All easing types are InOut types. You cannot create different in and out easing set for your frontend html application.
You can find more info and easing previews on this link. - Animation Duration
Is the duration from current camera position to desired camera view position.
Here you can adjust animation duration between two points, the value is in milliseconds (1000ms = 1s).
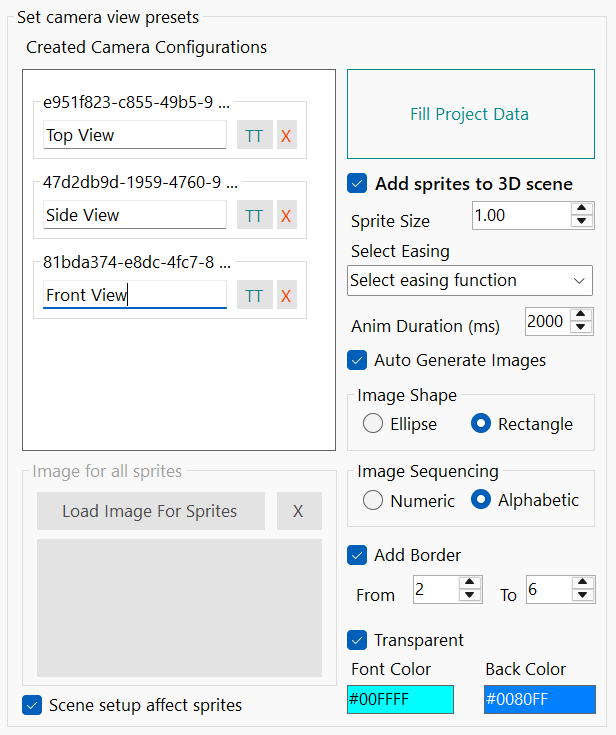
Sprite Image
You can assign a custom image to each sprite object in your scene manually, or enable automatic image generation for all sprites.
When automatic generation is enabled, the system creates a separate .png image for every sprite in the scene. This is especially useful when your objects need to follow a specific order or list for visual arrangement.
You can choose between numeric or alphabetic sequencing, and apply basic styling to the generated images to match your scene’s design.
Sprite Image Generator Options
Customize how automatic sprite images are generated using the following controls:
Image Shape
Defines the shape of the generated image.
- Ellipse
Creates a circular or oval image. - Rectangle
Uses a standard rectangular shape.
Image Sequencing
Controls how each sprite image is labeled.
- Numeric
Labels sprites with numbers (e.g., 1, 2, 3…). - Alphabetic
Labels sprites with letters (e.g., A, B, C…).
Borders
Adds a border around each generated shape in the image.
- Add Border
Enables border rendering and calculation. - From
Specifies the starting position of the border’s outer edge within the image. - To
Specifies the ending position of the border’s inner edge within the image.
Font and Background Color
Controls the appearance of text and shape background fill inside the image.
- Transparent
Makes the font color fully transparent. For better visual clarity enable this with hover overlay effect. - Font Color
Set the color of the label text (ignored if Transparent is enabled). - Back Color
Set the shape background fill color.
Image for all sprites
Load Image for Sprites: For every saved camera point, by default, sprite (White plane) is created in your scene on that position in 3D space.
If you want to add your own image to look and feel like rest of your scene you can import your favorite, to see it on sprites in scene instead of white plane.
For now, supported image formats are bmp, jpg, png and gif.
- Scene setup affect sprites
When checked, the scene lighting, color space, and tone mapping setup will affect the sprite material color.
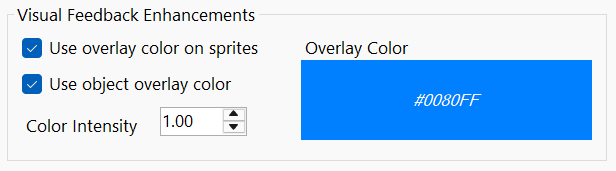
Visual Feedback Enhancements
Use this group of controls to enhance visual feedback and interactivity with your scene.
- Use overlay color on sprites
Enable or disable overlay color when hovering over sprite objects in scene. - Use overlay color on objects
Enable or disable overlay color when hovering over scene objects. - Color Intensity
Set intensity on overlay color. - Overlay Color
Select overlay color for visual feedback and interactivity.
ℹ️ INFO
You can add post-processing effects to objects or sprite overlays via the Scene and AR Setup tab. Simply click the Post Processing button to open the configuration form.
In the Post Processing form, you can enable visual effects such as Bloom or Outline, customizing them to enhance your scene’s appearance.
For detailed guidance and advanced options, refer to the dedicated Post Processing page.
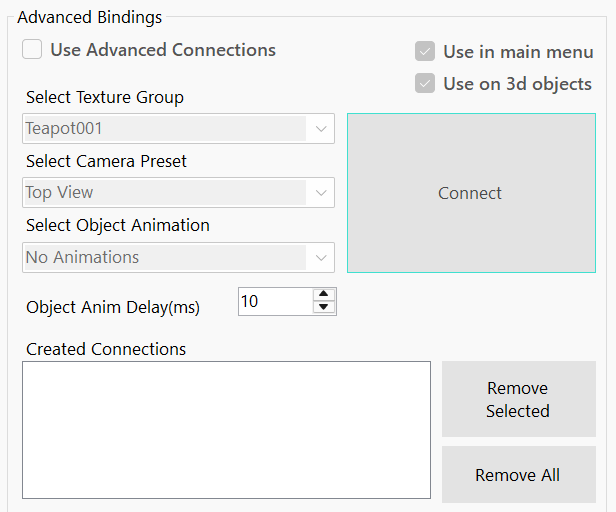
Advanced Bindings
This control group adds an extra layer of interaction to your HTML application.
What this actually mean?
This connect three parts of your scene, 3d object material (from Saved Textures list), Camera view and if any, imported 3d model animation, so when you click an item in the main menu to change some textures, camera is animated too from current position to connected camera view position and connected animation will also start to play.
Connections are automatically added to the Main Menu on the frontend HTML page and if you want, you can also attach this connection to your imported 3d object.
You can zoom in on particular object for better user experience when changing material texture on that object.
So, when user click on some object who has assigned textures for changing in frontend, with this option ON, camera and object animation can start to play synchronously, and if your flyout menus are enabled you can navigate through your scene without any other HTML element in your frontend.
You can add delay to imported object animation to keep camera and animation movements in sync.
So how this actually work?
Three dropdown lists perfectly mirror saved textures from Model and Material page, saved camera view positions and imported object animations, if any.
Select an item from each dropdown list, then click the Connect button.
Saved connection will appear in created connection list. If you want to remove some of the connections or all created, you can do this with buttons on the right side of connection list.
⚠️ IMPORTANT
If the imported object has no animations, they will be ignored.
There can be ONLY one connection between items e.g. one item in any of the dropdowns can be assigned to only one connection.
ℹ️ INFO
You can enable or disable object overlay functionality on Project Setup Page.
You can enable or disable sprites and sprite overlay functionality on this page (Camera Views page).
Update Camera Views
Click update scene button to save all settings used on “Camera Views” page to your project file. After this, your changes should be visible in web browser preview window on right side of application.