
- Importing 3d Model
- Saved Textures
- Animations and Cameras
- Multi Material Objects
- Model and Materials tab page controls
On this tab page, you can import your 3D model and configure various parameters before uploading it to the scene. Currently supported formats include OBJ, 3DS, FBX, DAE, glTF, and GLB.
Importing 3d Model
Once the application processes your model, you can select objects, primitives, or materials and assign textures accordingly.
You can then save the selected textures as a Texture Group, which can be used later during live production on your HTML frontend.
You can create a Global Texture Group, a collection of textures not initially linked to any object or material. Once added to the HTML frontend, selecting an object in the scene allows you to apply any texture from the group to that object.
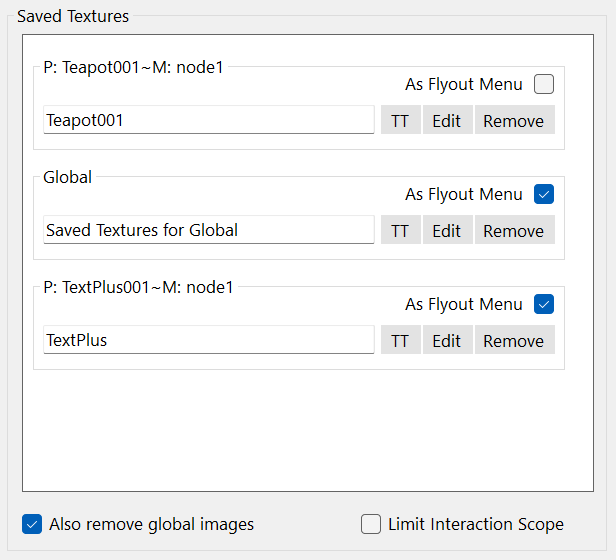
Saved Textures
When you assign a material to an object and import textures for it, a new group is created in the Saved Textures panel.
You can edit the images and rename the texture group and the updated name will appear in the Main Menu on your frontend HTML page.
Flyout Menu
Each texture group includes an “As Flyout Menu” checkbox, which allows you to attach a flyout menu to the 3D scene for easier texture selection.
Tooltips
Each texture group includes a TT button for entering group-specific tooltip text.
Use this to provide explanations, instructions, or contextual guidance for your users.
Tooltip display is fully automated:
- If a texture group has saved tooltip text, it will be shown automatically.
- Empty tooltips are ignored and will not be displayed.
You can customize the visual appearance of tooltips on the HTML Setup page.
If you’re not satisfied with a texture group, you can remove it entirely using the ‘Remove’ button.
To replace or delete individual images, click the ‘Edit’ button within the desired texture group and make changes in the Textures Control form.
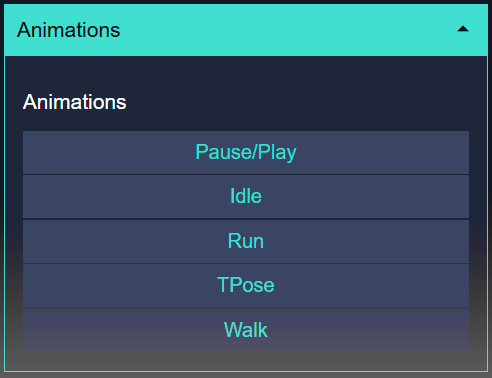
Animations and Cameras
If the imported model contains animations, they will be included automatically, and an ‘Animations’ menu item will be added to the Main Menu on the frontend HTML page.
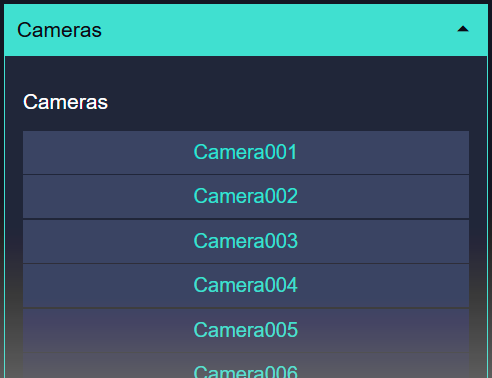
Similarly, if the model includes more cameras, they will be imported and listed under a ‘Camera’ menu item in the Main Menu.
You can enable or disable menu items or whole Main Menu on “Project Setup” tab page.
Multi Material Objects
In cases where an object uses multiple materials, a material selector will appear as popup menu, allowing you to choose which material the texture should be applied to.
This behavior is mostly true for Autodesk FBX objects. In contrast, glTF and GLB files typically assign one material per primitive. A primitive is a part of 3d object composed of polygon or group of polygons, each formed by three or more vertices connected by edges. These edges define the boundaries of the polygon, and the primitive itself may or may not have an associated material.
IMPORTANT
Imported 3D models should be well prepared, with UVW mapping coordinates clearly defined. The best way to ensure this is by baking textures in your preferred 3D application and exporting the model with baked textures and lighting information.
You can find more info on UV mapping and baking textures on “What is UV mapping?” page.
At the application level, Texture Groups are mirrored in two places: the “Camera Views” dropdown list under advanced connections, and the WooCommerce Product Exporter as product attributes. Each Texture Group in the Saved Textures panel corresponds to a product attribute, and every image added to that group becomes a term for that attribute.
When you upload an imported 3D model and update your project, Texture Groups are automatically added to the Main Menu in your HTML frontend. If a Texture Group is enabled as ‘Flyout’ in the Saved Textures panel, a menu with thumbnail images will appear in your 3D scene. You can customize the easing type and animation duration for flyout menus in the “HTML Setup” tab to personalize how flyout and images animate on the frontend.”
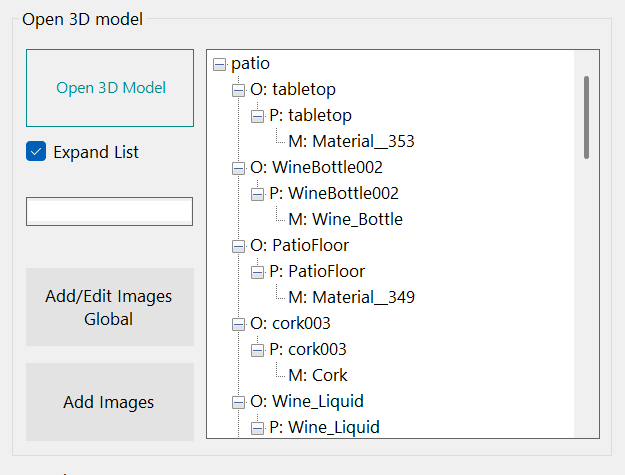
Model and Materials tab page controls
- Open 3D Model
Import your 3D model into the application. - Expand List
Expand or collapse the model tree to show or hide nested objects. - Add/Edit Images Global
Create or modify a standalone ‘Global’ texture group, independent of specific objects. - Add Images
To import textures, first select an object, primitive, or material, then click ‘Add Images’. The imported textures will be associated with the selected item. - Also remove global images
Control whether the Global Texture Group is preserved when importing a new model. Since Saved Texture Groups are cleared during object changes, this option lets you decide whether Global textures should be cleared too. - Limit interaction scope
When enabled, this restricts user interaction to only the objects in the scene that use materials listed in the Saved Textures panel.
If a Global Images Group is present and As Flyout Menu in global group is checked, this option will be automatically disabled.
Saved Textures Panel: Area where your texture groups will appear.
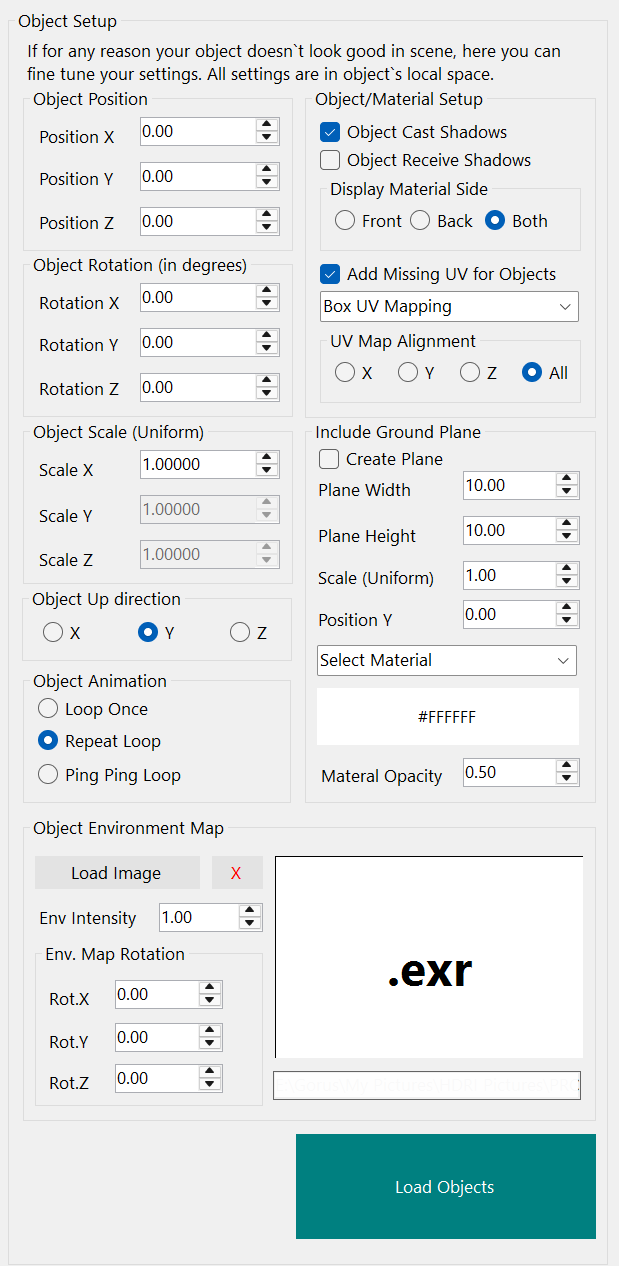
Object Setup
Use this panels to precisely adjust the position, rotation, and scale of your imported 3D model along the X, Y, and Z axes.
- Object Position
Position X, Position Y, Position Z - Object Rotation (in degrees)
Rotation X, Rotation Y, Rotation Z - Object Scale (Uniform)
Scale X, Scale Y, Scale Z
Object scaling is locked across all three axes, ensuring the model retains its original proportions upon import. This is typically the only setting you’ll need to adjust when importing different models.
Use Scale setting to maintain the original size of your imported model. With a bit of simple math, you can scale the model to the correct size, normalizing the size so it appears correctly in the scene.
- Object Up direction:
Some 3D programs use the Y axis for vertical orientation and the Z axis for depth, while others treat the Z axis as the vertical direction. Depending on your model’s origin, you can use this setting to define how the imported 3D model should be oriented.
Options: X, Y (selected), Z
Object Material Setup
- Cast Shadows
Shadows are enabled by default. To see them in your scene, make sure shadows are also enabled on the lights you’ve created and in the ‘Scene Setup’ tab. - Receive Shadows
This setting controls whether objects receive shadows. It is disabled by default, but can be toggled as needed. If rendering artifacts occur in the HTML frontend, disabling this option may help. - Display Material Side
This setting determines how materials are rendered on the 3D object:
Front Side: renders material on outward-facing surfaces
Back Side: renders material on inward-facing surfaces
Both Sides: renders material on all surfaces
UV Mapping
- Add Missing UV for Objects
This option automatically adds basic UV coordinates to objects that don’t have them.
For best results, always try to import models that are fully prepared — with proper geometry, materials, and UVs already in place. - Select UV Mapping Type
You can choose between Box UV Mapping, Spherical UV Mapping, Cylindrical UV Mapping, Planar UV Map. - UV Map Alignment
Select the axis from which you want to apply UV map projection. You can choose between X, Y, Z, and All.
In “All” mode, the application analyzes and groups all faces of the object by their dominant orientation, then applies the selected UV mapping type based on each group’s dominant axis.
Include Ground Plane
This part of application is created with shadows in mind. With ground plane created and Shadow Material applied, you can “Catch” shadows from other objects. In combination with background image, you can put your 3d model to environment that he belongs.
- Create Plane:
Enable or disable plane creation on HTML frontend. You can use this plane as ground or floor plane. - Plane Width:
Set the width of the ground plane. - Plane Height:
Set the height of the ground plane. - Scale (Uniform):
Apply a uniform scale multiplier to both width and height. Useful for simulating an infinite ground plane. - Position Y:
Adjust the vertical position of the plane.
If your 3D object isn’t perfectly aligned to Y=0, you can reposition the plane or adjust the object’s position using the Object Position controls. - Select Material:
Set material for your ground plane.
Options are: Standard Material, Physical Material, Phong Material, Lambert Material, Normal Material, Toon Material … - Shadow Material is similar to the matte/shadow materials found in other 3D applications.
It’s a transparent material designed to ‘catch’ and display shadows cast by other objects. You can control the brightness or darkness of the shadows using the opacity setting. This is a basic material setup—it’s assumed that your 3D model has been prepared and configured in a specialized 3D application before being imported.
Learn more about materials on the dedicated materials page. - Select material color and opacity
Set the diffuse color of the ground plane and adjust the material’s opacity level.

Object Animation Settings
If your imported model contains embedded animations, they will be automatically included in your scene. By default, the first animation in the file will begin playing. This section allows you to configure how all animations behave when they are started.
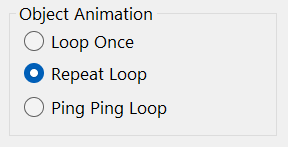
- Loop Once
The animation plays a one time from start to finish, then stops. Useful for one-time actions like opening a door or triggering a gesture. - Repeat Loop
The animation continuously repeats from the beginning once it reaches the end. Ideal for idle motions, walking cycles, or background animations. - Ping Pong Loop
The animation plays forward to the end, then reverses back to the start, repeating this back-and-forth motion. Great for oscillating effects like breathing, swinging, or pulsing.
Playback Behavior
- When starting any animation, it will begin from the start frame (frame 0) by default.
- The Play/Pause button in the application’s HTML frontend will pause and resume playback from the current frame, allowing seamless control without restarting the animation.
- Any other dedicated button (e.g. “Start”, “Restart”, or specific action triggers) will start the animation from the beginning, regardless of its current state.
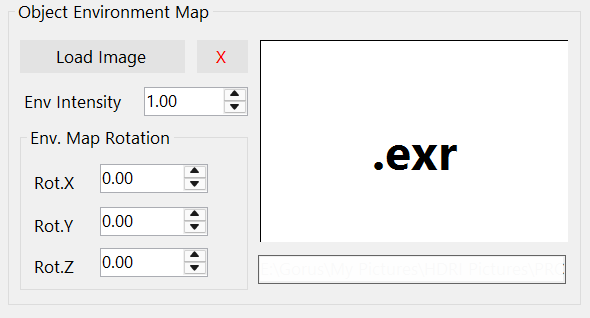
Object Environment Map
Adds an environment image to the object’s material environment map. The map is applied at the object level and is always loaded as a spherical environment used for reflections and refractions. This is useful when you want to visually separate object reflections from the background environment.
IMPORTANT
If an environment map is added at the object level, it will be used for that object’s reflections and refractions. If no map is provided, the scene background will be used instead.
Additionally, if “As Environment Map” is checked in the Sun/Sky Environment group on the Scene Setup page and Sun/Sky option is on, that environment will be used for reflections/refractions.Environment maps are applied in the following priority order:
Sun/Sky Environment – if “As Environment Map” is enabled in the Scene Setup and Sun/Sky option is on.
Object Environment Map – if set, used for object’s reflections/refractions.
Scene Background Map – used when neither Sun/Sky nor Object Environment Map are assigned.
Load Image
Upload a image file in one of the supported formats: HDRI, EXR, JPG, PNG, BMP, etc.
Remove Image
Clears loaded image.
Background Rotation
Adjust the orientation of the environment map and set precise position of your spherical background.
Background Intensity
Adjusts the brightness of your environment map image.
Load Objects
Click load object button to save all settings used on “Model and Materials” page to your project file. After this, your changes should be visible in web browser preview window on right side of application.