
- Background and environment settings.
- Sun/Sky Environment
- WebGL Parameters
- Tone Mapping Setup
- Shadow Parameters
- Fog
- Override Material setup
- Update Scene
On this tab, you can configure all key settings for your project and WebGL scene.
Background and environment settings.
This section lets you set up the overall atmosphere or visuals of the scene.
- Transparent Background
Your scene background will be transparent. When you embed your project into another web page, the background of the parent page will be visible.
- Color
Your scene will have chosen color as background.
If Color as background is selected, you can use the button below the dropdown to set the background color for your scene.
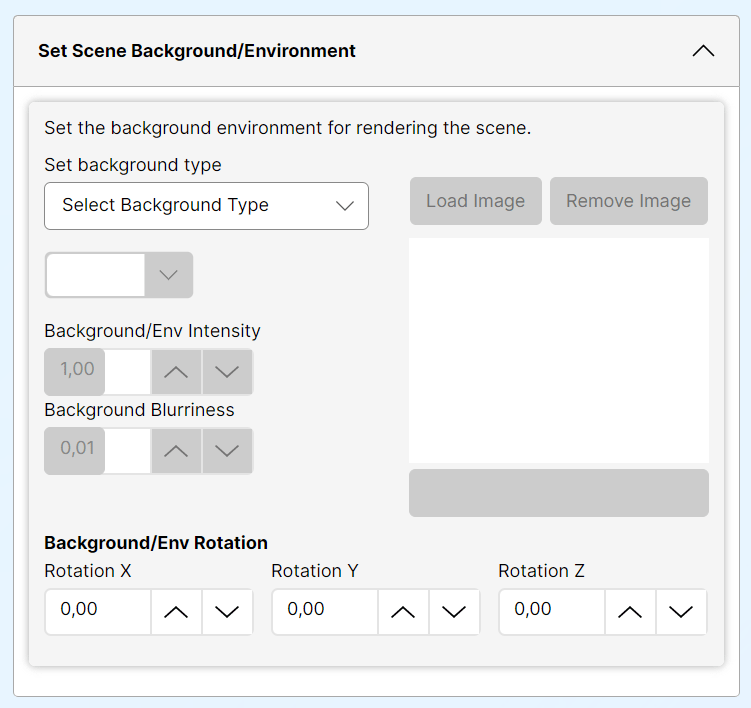
- Image Background( Screen )
Add image as scene/canvas background.
- Spherical Environment
Add environment image to scene background. This is fully functional 360 degree image background. - Load Image
To set an image as the background of your scene, select “Image Background” and upload a file in one of the supported formats: HDRI, EXR, JPG, PNG, BMP, etc.
- Background Intensity
Adjusts the brightness of your background image. - Background Blurriness
Adjust blur level of your background image. - Background Rotation
Adjust the orientation of the background image and set precise position of your spherical background to fit the scene.
Sun/Sky Environment
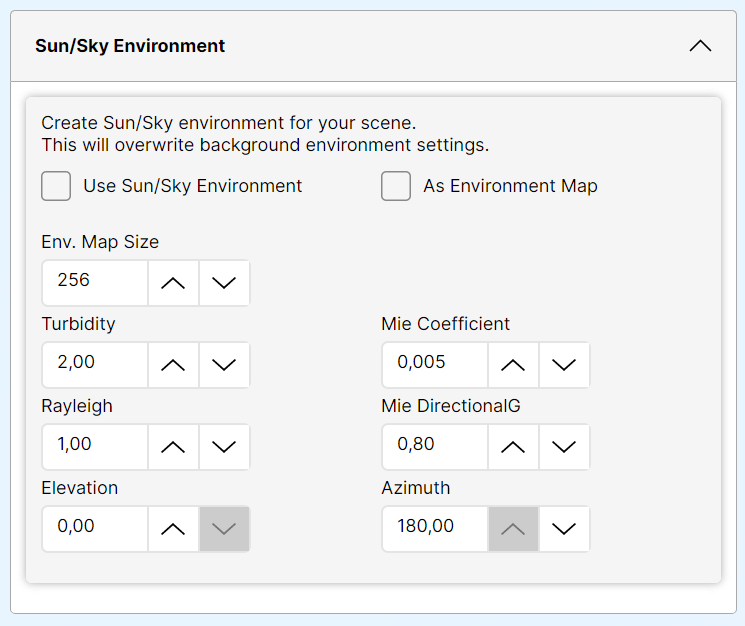
Instead of using image background, you can set sun/sky system as a skydome for your scene background and overwrite background/environment settings. This sun/sky system is based on aka The Preetham Model.
Use Sun/Sky Environment
Check this box to add sun/sky system in your scene.
As Environment Map
When enabled, the sun/sky environment is used for reflections and refractions, overriding the image background.
Environment Map Size
Specifies the resolution of the rendered environment map in pixels. Higher values improve image quality but reduce overall scene performance.
Turbidity
Determines the amount of dust in the air and affects the color of the sun and sky. Smaller values produce a clear and blue sky, while larger values make them yellow and orange.
Rayleigh
Rayleigh scattering is a phenomenon that explains why the sky appears blue during the day and takes on reddish hues during sunrise and sunset. Rayleigh scattering occurs when the particles are much smaller than the wavelength of light.
Smaller values produce a clear and blue sky, while larger values make them yellow and orange.
Mie Coefficient
Mie scattering is a type of light scattering that occurs when the size of the particles causing the scattering is comparable to the wavelength of the light.
Mie DirectionalG
In Mie scattering, a significant amount of light is scattered in the forward direction (along the path of the incoming light). This effect is particularly noticeable when the particles are close in size to the wavelength of light. For example, mist or fog often appears brighter when viewed with the light source behind it, as the forward-scattered light dominates.
Set how much scattering will be directional mie scattering.
Elevation
Vertical position of the sun. From 0 to 90 degrees, where 0 is position of the sun near ground and 90 degrees is sun position direct above.
Azimuth
Horizontal position of the sun from -180 to 180 degrees.
WebGL Renderer Parameters
These controls are specific to the scene renderer. You can set WebGL renderer settings to fine tune your final scene appearance.
ℹ️ INFO
Post Processing button will open dedicated form to set post-processing effects.
In the Post Processing form, you can enable visual effects such as Bloom or Outline, customizing them to enhance your scene’s appearance.
For detailed guidance and advanced options, refer to the dedicated Post Processing page.
Antialiasing: Enables the renderer to apply antialiasing in the final output. Antialiasing is the process of smoothing jagged edges on 3D objects to produce cleaner, more visually appealing renderings.
Renderer color space: Choose color space for your renderer.
- No color space
Use default color space (SRGB Color Space) - SRGB Color Space
SRGB Color Space (“srgb”) refers to the color space defined by the Rec. 709 primaries, D65 white point, and nonlinear sRGB transfer functions. sRGB is the default color space in CSS, and is often found in color palettes and color pickers.
Colors expressed in hexadecimal or CSS notation are typically in the sRGB color space. - Linear SRGB Color Space
Linear SRGB Color Space (“srgb-linear”) refers to the sRGB color space (above) with linear transfer functions. Linear-sRGB is the working color space in three.js, used throughout most of the rendering process. RGB components found in three.js materials and shaders are in the Linear-sRGB color space.
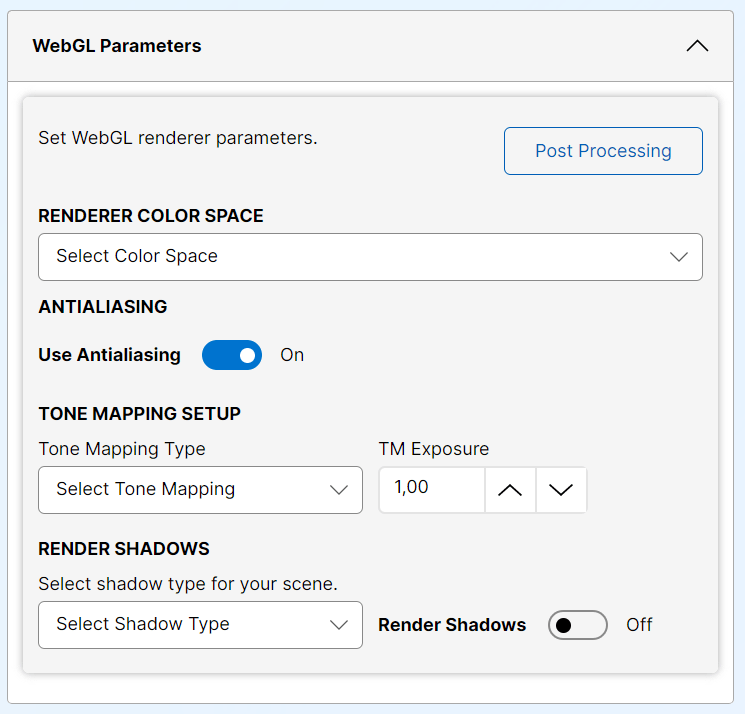
Tone Mapping Setup
WebGL Renderer’s tone mapping property is used to approximate the appearance of high dynamic range (HDR) on the low dynamic range medium of a standard computer monitor or mobile device’s screen.
Select tone mapping for your scene. You can choose from different types of tone mapping for your scene.
- No Tone Mapping
- Linear Tone Mapping
- Reinhard Tone Mapping
- Cineon Tone Mapping
- ACES Filmic Tone Mapping
- AgX Tone Mapping
- Neutral Tone Mapping
TM Exposure
Set level of exposure for your tone mapping setup.
IMPORTANT
Choosing any tone mapping type other then “No Tone Mapping” will automatically add TM Exposure slider to Main Menu on application front end. You can enable or disable this functionality on “Project Setup” page.
Shadow Parameters
If you want to have shadows in your scene render, here you can set and choose shadow type for your scene.
To actually see shadows in scene you need to check “Cast Shadows” checkbox in your light setup.
On Model and Materials tab page all objects are flagged to cast shadows. You can enable or disable imported object shadows directly from the “3d Model and Materials” tab page.
Select Shadow Type:
Select shadow type for your scene.
- Basic Shadow Map gives unfiltered shadow maps – this is fastest rendering shadow, but with lowest quality.
- PCF Shadow Map filters shadow maps using the Percentage-Closer Filtering (PCF) algorithm
and this is default shadow map in scene.
- VSM Shadow Map filters shadow maps using the Variance Shadow Map (VSM) algorithm.
When using VSM Shadow Map all shadow receivers will also cast shadows.
AR and VR Expirience
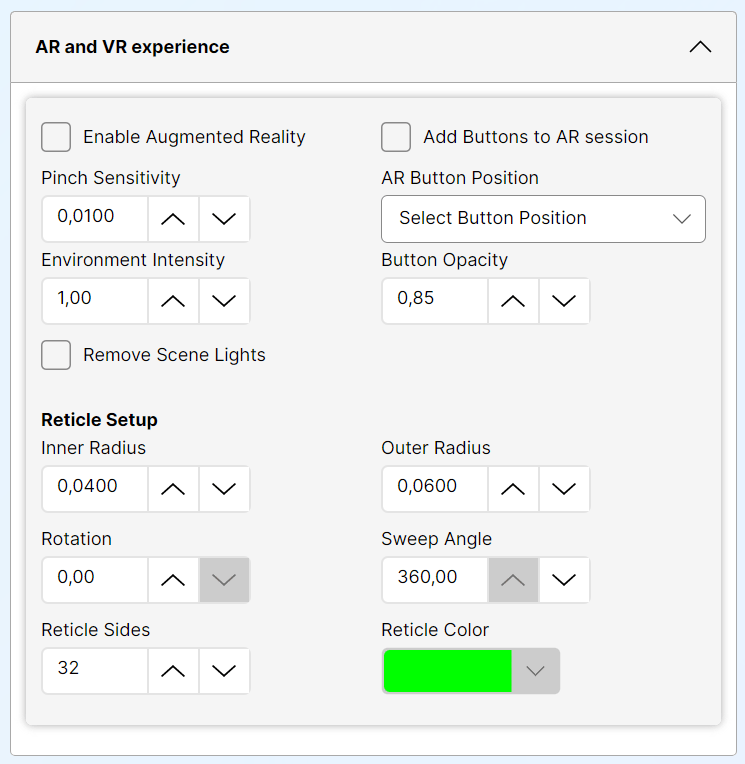
Your scene supports Augmented Reality (AR) and Virtual Reality (VR) modes, each with configurable controls to fine-tune user interaction and environment behavior.
When enabled, Augmented Reality adds an AR button to your HTML frontend. If the user’s device doesn’t support AR mode, the button will generate and display a QR code linking to your project. If AR is supported, the user will enter an AR session directly.
AR/VR Controls:
- Enable Augmented Reality
Toggles AR or VR mode on/off. - Pinch Sensitivity
Adjusts how responsive pinch gestures are for scaling or interaction. - Environment Intensity
Controls lighting and shading strength in the AR/VR environment. - Remove Scene Lights
Dynamically insert or remove scene lights during an AR session. When scene lights are removed, objects will receive more natural lighting based on the real-world environment captured by your device’s camera.
You can also choose to keep manually added lights – using environment lighting and custom lights together is fully supported. These options are not mutually exclusive. - Add AR Buttons to Session
Injects AR-specific UI buttons (e.g., rotate, scale, exit) into the active session.
ℹ️ INFO
The AR button will generate a QR code for the current link in your project if the device doesn’t support AR. However, if you scan this QR code using a mobile device while previewing in EasyThree, the link will point to local PC server page and won’t work as expected.
To preview your project via QR code, it must be uploaded and accessible online.
Reticle Creation
Customize the visual reticle used for targeting or placement in AR scenes. The reticle helps users identify where objects will be placed or interacted with.
Reticle Parameters:
- Inner Radius
Defines the size of the reticle’s center hole. - Outer Radius
Sets the full size of the reticle. - Rotation
Rotates the reticle shape around its center. - Sweep Angle
Controls how much of the reticle arc is visible (e.g., full circle vs. partial arc). - Number of Sides
Determines the polygonal smoothness of the reticle (e.g., triangle, hexagon, circle). - Reticle Color
Sets the color of the reticle for visibility and styling.
Main AR button position
Select starting position of your AR button. Where you want your AR button to appear.
ℹ️ INFO
On iOS devices reticle will not be visible.
Fog
Add fog to your scene. You can choose between two different fog types.
- No Fog
No fog will be used in scene. - Linear Fog
This type of fog grows linearly denser with distance from minimum to maximum distance parameter from active camera used in scene.
Use Minimum and Maximum Distance to fine tune your fog in scene.
Fog will start applying at minimum distance from camera and finish at maximum distance from camera.
Objects closer than the minimum distance or farther than the maximum distance won’t be affected by fog. - Exponential Fog
This type of fog dense exponentially squared from active camera in scene. Near camera gives you clear view and exponentially densening fog farther from active camera.
Use Exponential Fog Density to increase or decrease the fog’s thickness.
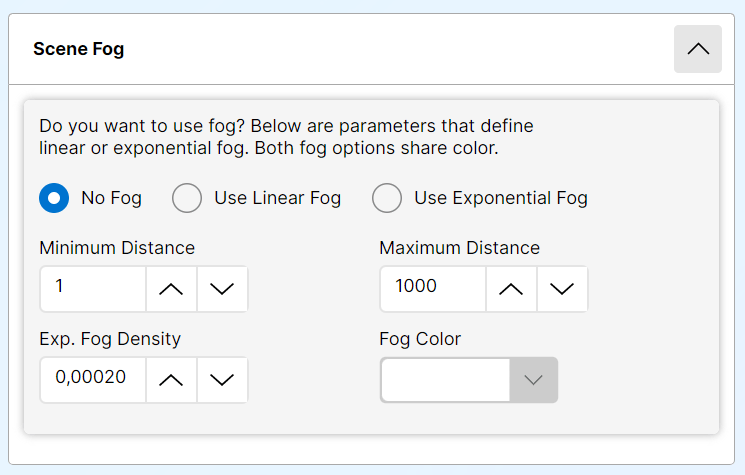
Fog Color: Choose color of your fog.
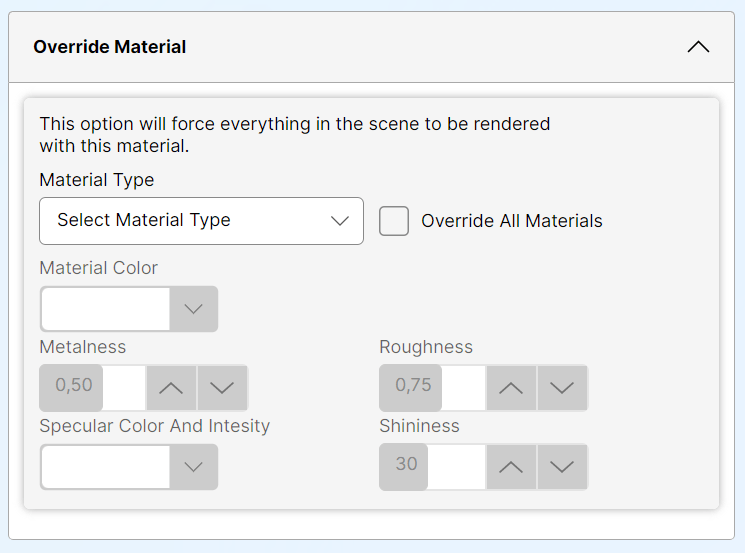
Override Material setup
Here you can force all materials in the scene to render using a selected material. This provides a quick way to preview your lighting setup or evaluate the overall appearance of your model in the scene.
You can also configure basic parameters for each material type to fine-tune the visual output.
If Post Processing is enabled, due to compositor limitations this setting will not affect your scene.
Override
Check this checkbox to activate material override.
Material Type
You can choose from different material types to be rendered in scene.
- Standard Material
Standard physically based material. Physically correct model is used for calculations and this gives a more accurate and realistic looking result.
- Physical Material
Extension of the Standard Material that allows for greater control over reflectivity.
- Phong Material
Material for shiny surfaces with specular highlights. Use non-physically based
Blinn-Phong model for calculating reflectance.
- Lambert Material
Material for non-shiny surfaces, without specular highlights.
- Normal Material
Material that maps the normal vectors to RGB colors.
- Toon Material
Extension of the Phong Material with toon shading.
- Depth Material
Material for drawing geometry by depth. Depth is based off of the camera near and far plane. White color is nearest, black is farthest.
You can fine tune appearance of depth map using your near and far camera settings on “Camera” tab page.
This material will give you fast setup for creating depth maps for your 3d objects. Depth maps can be used, between other things, for co2 and fiber laser deep marking and engraving, and for cnc machine working.
Color
Choose color for selected material.
Metalness, Roughness and Shininess values and specular color are different setups for selected material and will be activated in accordance with chosen material type.
Update Scene
Click update scene button to save all settings used on “Scene Setup” page to your project file. After this, your changes should be visible in web browser preview window on right side of application.